
Macro photography
An art of showing small as big !
Macro photography
An art of showing small as big !
An overview of Macro Photography:
Before we get into the macro photographs that I have shot, I would like to give some basic information about Macro Photography, the technique , the equipment and the typical challenges that we face during the photography process. Macro photography is the art of taking pictures of very small objects or living organisms and capturing images that are at least of the same size as the object or much bigger than their actual size.
The ratio of the subject on the camera sensor to the actual size of the subject defines the scale-up ratio of the lens.
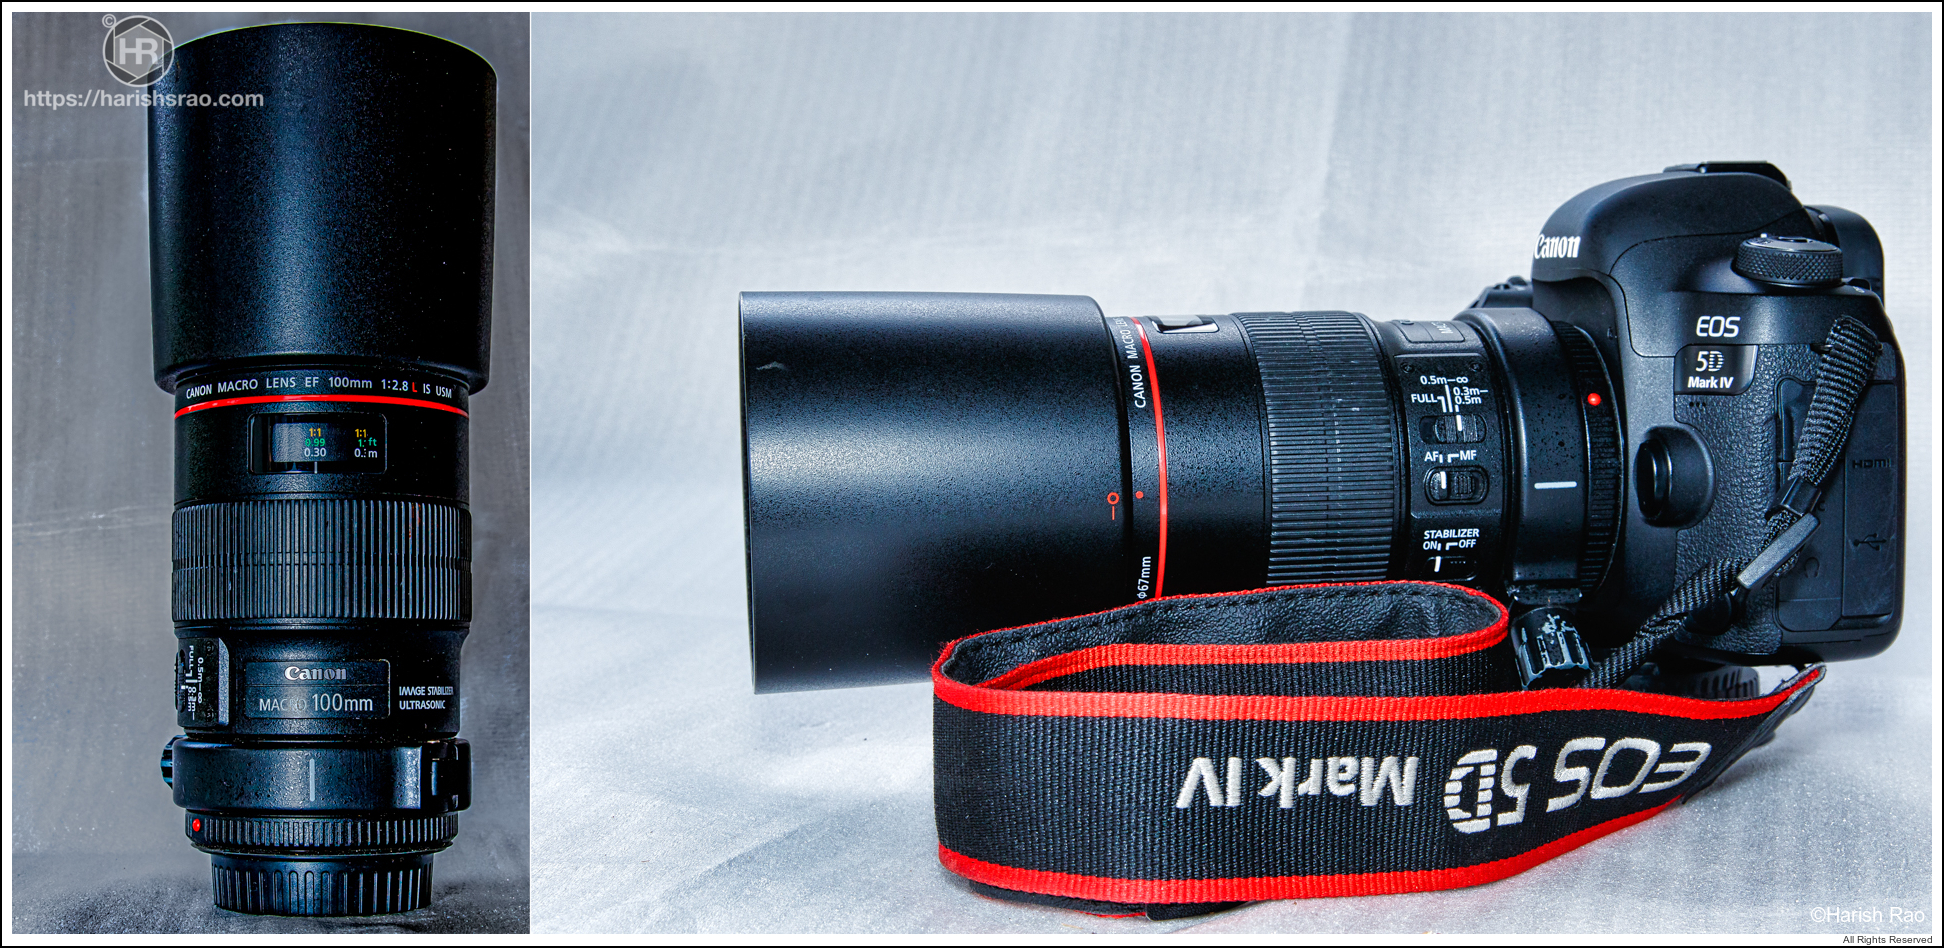
Canon's flagship Macro Lens 100mm F2.8L
The traditional way to capture a macro picture requires use of a special purpose lens called a Macro Lens. There are other ways to capture Macro images using techniques called “Lens Reversal” , Extension tubes” or “Bellow”. However the purpose of this discussion is not to get into technical details of the macro equipments but to have a basic understand.
The following critical factors influence a macro picture:
- Magnification
- Working distance
- Depth of field
- Light
- Focusing the subject
- Managing the subject
- Photographer’s ethics
Magnification:
Working Distance:
For an amateur photographer like me , magnification is a factor of the lens that I can afford and its magnification specification. Typically the commercial macro lenses have 1:1 magnification factor. For example, I use a Canon Macro 100mm F2.8L USM lens that gives 1:1 images if shot from 30 cms. There are other lenses like the one from Venus Laowa optics that delivers 2:1 magnification images.
Also it is very important that the focus speed of the lens is fast and accurate while it is very silent during focussing . The canon lens is USM which means it has an Ultrasonic Motor which is very fast to focus yet very silent.
The distance of the subject from the front of the lens is called the working distance. Its a great luxury to have a longer working distance as you are working with small very sensitive living organisms that will fly away at the smallest disturbance.
The working distance is directly proportional to the focal length of the lens . The commercially available macro lens focal length start at 60mm and go upto 180mm. The 60mm lens gives about 90mm working distance , the 100mm lens 150mm while the 180mm focal length will let you be at 240mm from the subject.
The Tamron 60mm macro retails at approximately $450 while Canon 100mm at $1300 and Canon 180mm at $1400. It means that we need to spend more money if you want the luxury of having longer working distance.
Depth of field:
The depth of field is depth to which the subject appears sharp. Basically it is the distance from the nearest point to the farthest point in the picture that is sharp.
In a macro picture it is very important to have a clutter free smooth background and have the subject in sharp focus so that the viewers attention is on the details of the subject with no disturbance from the clutter around the subject. One of the the ways to achieve this is to setup the aperture on the camera just adequate enough to keep the subject in focus while making the background blur.
The depth of field is significantly influenced by:
- The aperture that you choose to shoot the picture
- The distance of the background from the subject
- The focal length of the lens that you use
The DOF is predominantly influenced by the aperture at which the picture is shot. Wider apertures like F2.8 gives faster shutter speed and a shallow depth of field. However the DOF may be so shallow that a significant part of the subject itself may be out of focus. However the background will have a nice blurry effect.
On the other hand smaller apertures like F16 will not only provide deeper depth of field but will also bring significant background in focus. This means that the subject will be sharp and in-focus however if the distance between the subject and the background is not much then the background will clutter the frame. Also apertures like F16 allows very little light on to the sensor and hence the shutter speed will be long. This means that handheld shots are very difficult at higher F-Stop numbers. A tripod may be essential.
Most Macro lenses deliver optimum performance around F8 -F11 with a well balanced Depth of field and hence this is the sweet spot F-Stop range for most macro photographers. Depending on the available ambient light, handheld shots may also be feasible with adequate shutter speeds in this aperture range.
Light:
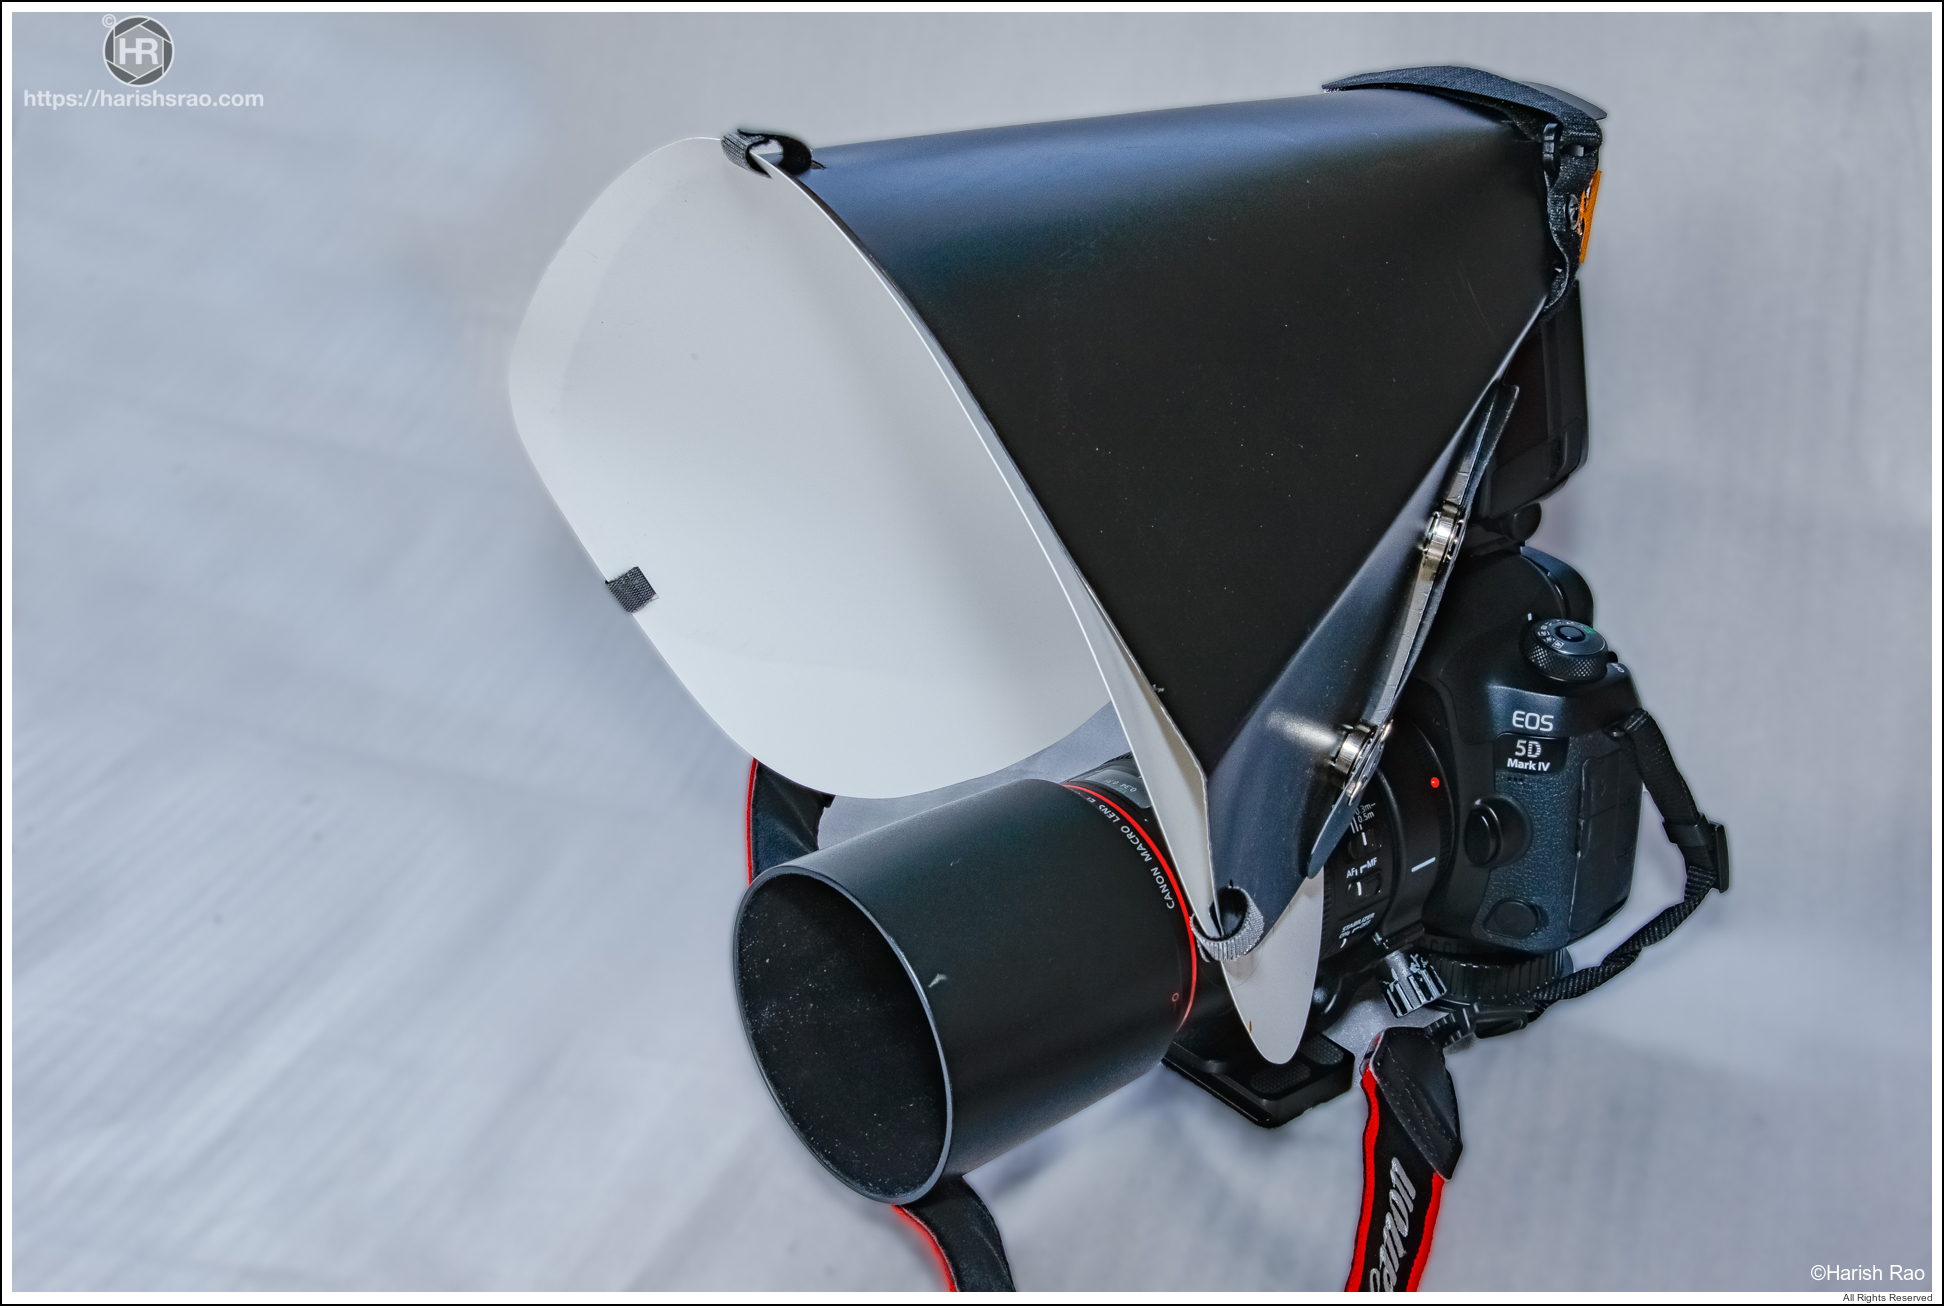
Having adequate light on the subject is a significant challenge when you are shooting macro pictures out in the field. Very often the subjects are camouflaged under a bunch of leaves . The leaves may be blocking the light falling on the subject. The other reason may be that you are between the light source and the subject and your shadow may be blocking the light falling on the subject. In that case it is inevitable that you supplement the scene with additional light. Generally the on camera flash is not preferred as it is a very small source of light and hence delivers harsh light. Macro photographers use external flash to light up the scene .
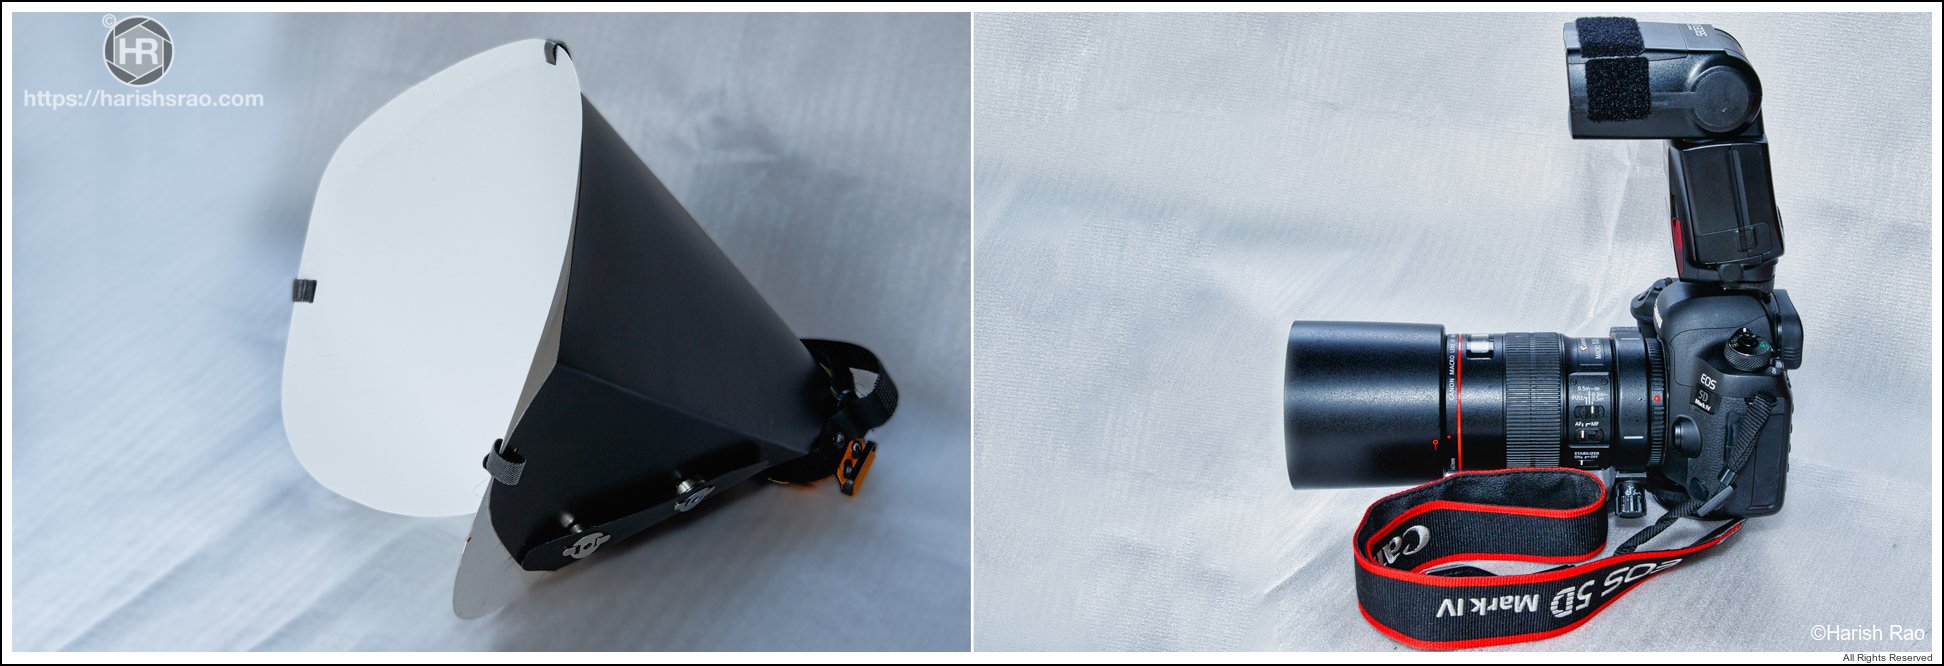
The external flash is often fitted with a good diffuser to convert the light from the flash into a larger source there by softening the light. The main flash is often used as fill flash where the flash output is considerably reduced and is just enough to subtly light up the dark areas on the subject.
Sometimes macro photographers get innovative and will to try out artistic lighting which will call for use of a second flash that provides different effects like rim lighting or backlit subject. In this situation the second flash is setup as a slave to the main flash. You can control the intensity of the main and slave flashes independently from camera control menu to create an artistic lighting to provide dramatic effect on the subject.
Focusing the subject
Keeping the subject in sharp focus is the most difficult task in macro photography. There are several reasons for this:
- The subject may be constantly moving
- Light is not adequate for achieving faster shutter speeds
- There may be a challenge to use a tripod
We just discussed the lighting challenges during macro photography. If you do not use a flash then in order to overcome the lighting challenges often times you may have to either increase the ISO or use longer shutter speeds. Many macro photographers choose not to use higher ISO as it produces grains in the picture. While the new generation cameras are capable of shooting at higher ISO like 800 and above without much grains but it is not preferred.
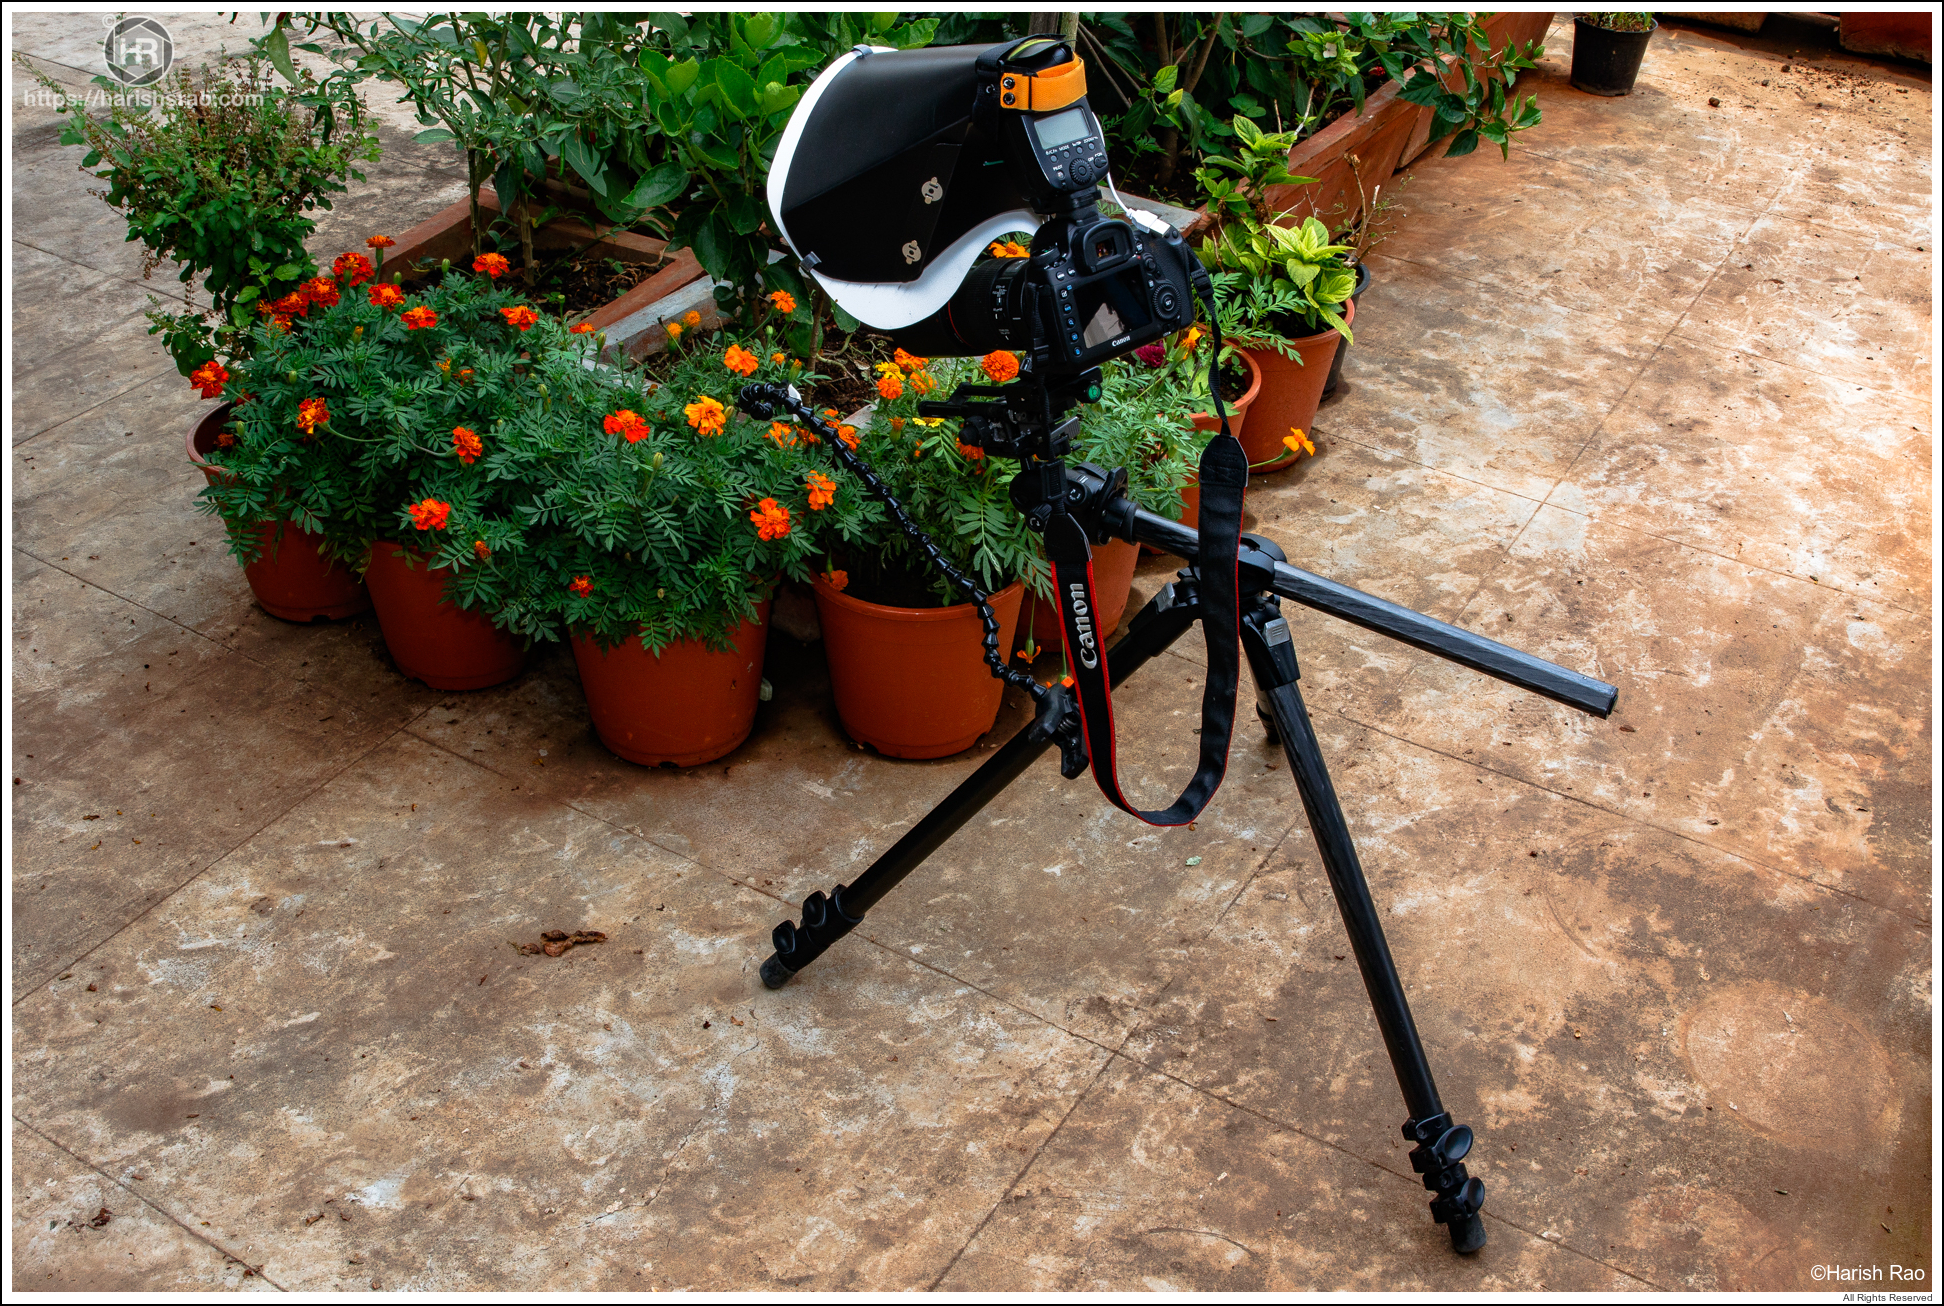
The second option of using longer shutter speeds calls for use of a sturdy tripod. Many macro photographers use a tripod even when they are using a flash with diffuser. A tripod with a detachable centre column that can also be used as horizontal bar for mounting the camera is very useful.
Do not be afraid of the use of Manual Focus on lens. Most macro photographers use manual focus as the many time while shooting small subjects, the lens will have a tendency to hunt if you are trying to nail the focus point on the tiny eyes of the subject. Also, it is prudent to have a good understanding of how you can quickly change the power output on your flash by using the camera menu control so that you can precisely control the power output of the flash while using it in manual mode. For example you can use the Custom Setup on the camera to assign the Flash Control menu to one of the buttons on the camera. Study the camera’s operating manual on how this custom setup can be achieved as it is very helpful to have the flash lighting control menu set to a button on camera instead of traversing through several menus to get to that function.
Always use a remote trigger to fire the camera or set the camera to 2 Seconds delay settings in order to avoid camera shake while taking the picture.

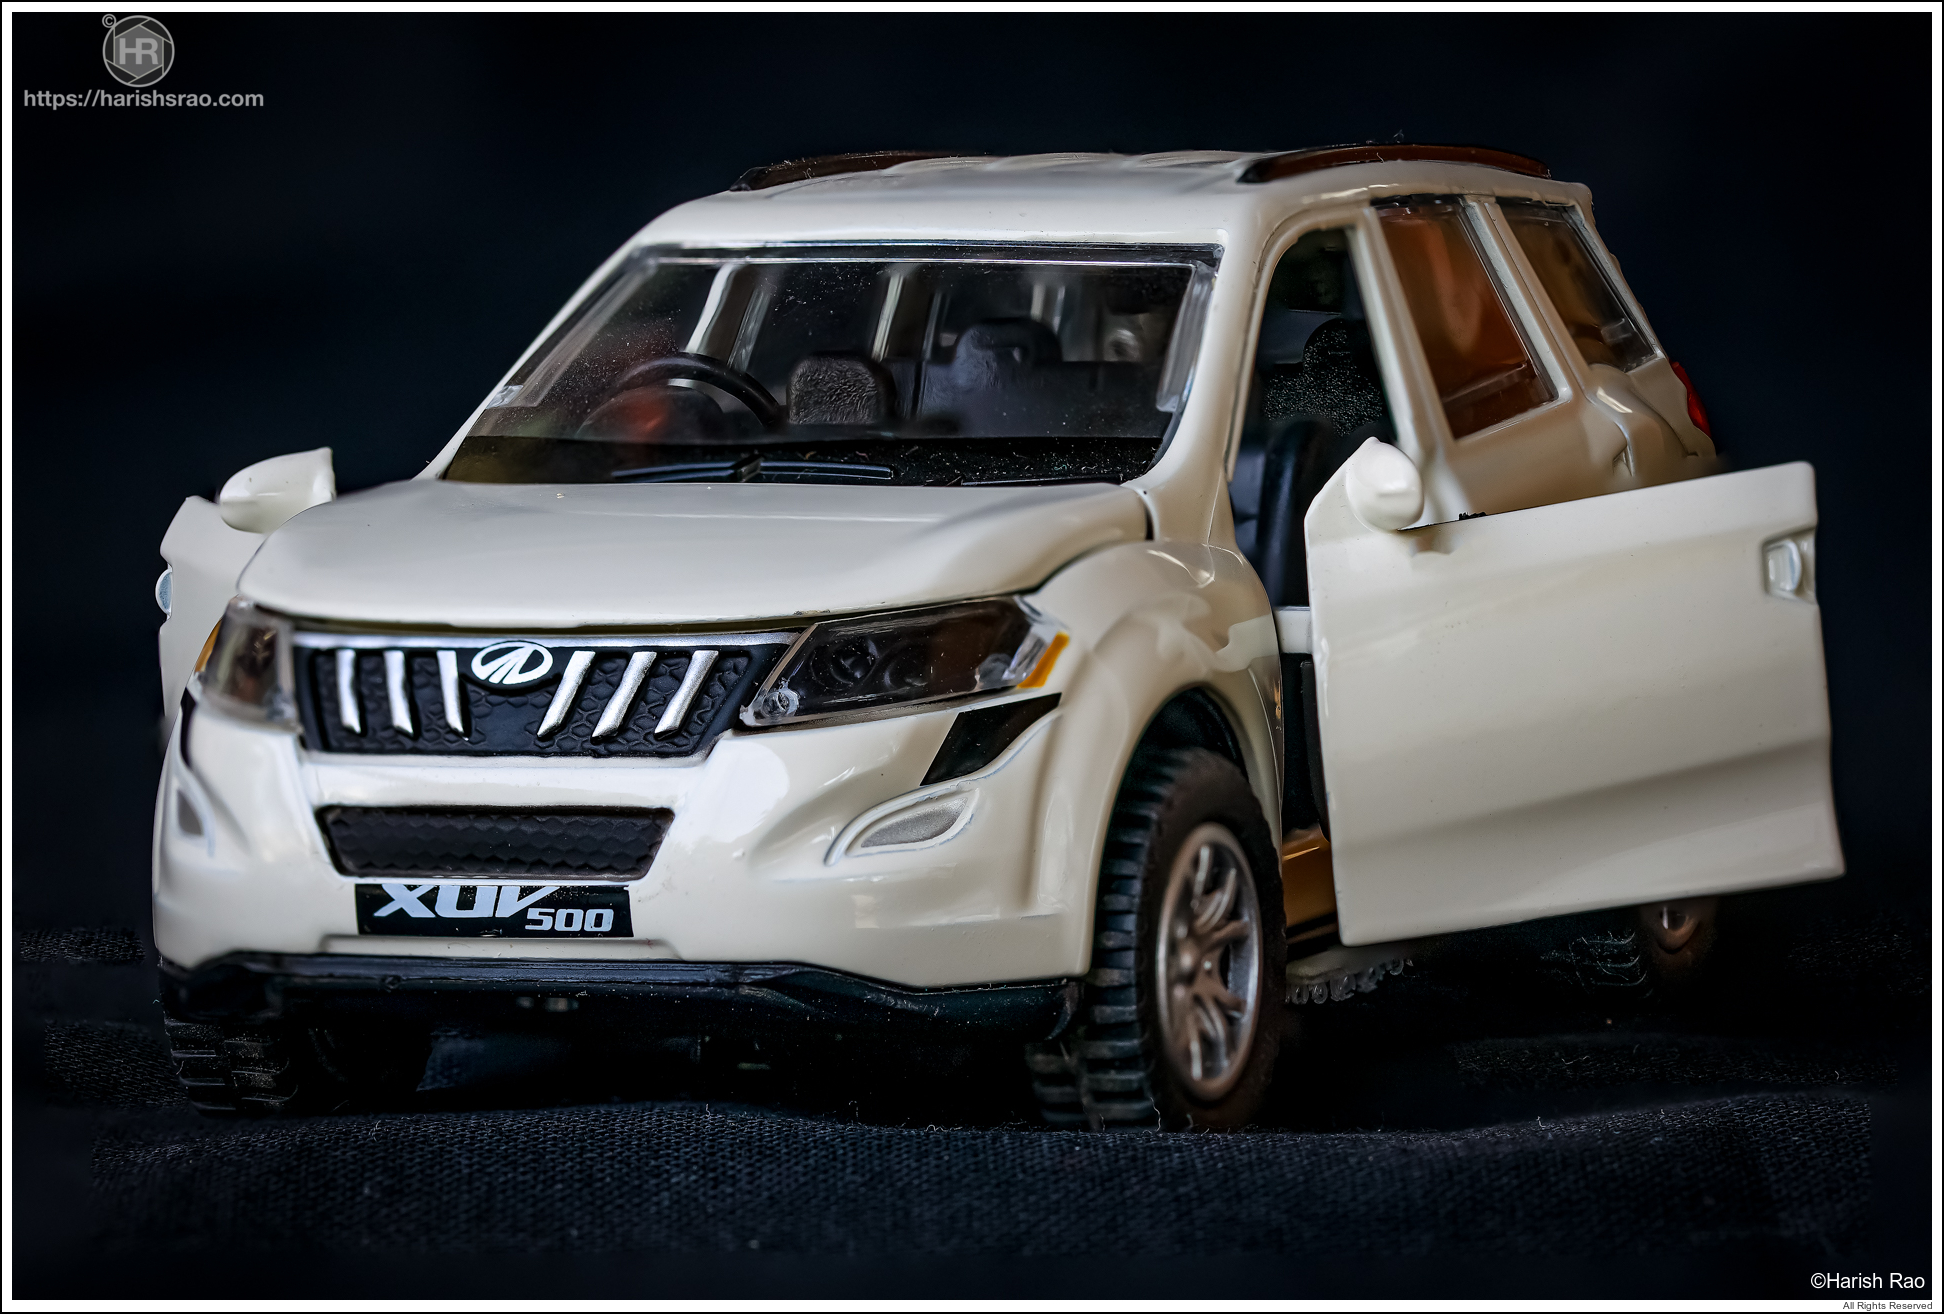
When depth of field is limiting the subject sharpness then there is an advanced method of photography called “Focus Stacking” . In this method you take several pictures of the subject by continuously varying the focus starting from the nearest point of subject till the farthest. This way you get several frames along the depth of the subject , each frame having a little portion of the subject tack sharp. The above picture shows a stack of 4 pictures of model SUV by varying the focal plane along the depth of the SUV.
You open all these stacked images in a post-processing software like Photoshop. Photoshop will organise the sequence of pictures along the depth as layers. It will first align all the layers and then keep visible only that portion of the picture that is tack sharp. Rest of the picture is masked. Finally it will merge all the layers that has portions of subject tack sharp along the depth to give a picture that is sharp end-to-end. Since multiple pictures with portion of subject sharp is stacked together to give a fully sharp subject end-to-end , the method is called “Focus Stacking”.
There are two ways to capture the stacked picture:
- Using the focus ring on the lens: You can use the lens focus ring to vary the focus point on the subject starting from the nearest point till the deepest point on the subject. This will give multiple images each having a little part of subject in focus. In this method the camera remains stationary.
- Using focusing guide rail : The other method is to mount the camera on the focusing guide rail and rotate the focusing rail knob to move the camera through the depth of the subject. Capture an image at fixed rotation of the knob for example take a picture for every 3600 rotation of the knob thereby generating multiple images each having a little part of subject in focus. In this method the focus setting in camera remains constant while the focus plane is varied by moving the camera
Both the methods work well. It is the personal preference and availability of the focusing guide rail that will dictate the choice.

Managing the subject
The sharpness of the picture also depends on how still the subject is while you are taking a picture. This is more important when you are taking stacked images of a living subject.
While you cannot dictate the subject behaviour, there are several best practices that you can follow when you approach the subject for taking a macro picture:
- The best time to go out for macro photography is early in the morning an hour before the sunrise. Especially in winter if you go before sunrise the wings of the butterflies are still wet and it will be perched in one location for a longer time. Also, before the sunrise the insects generally will have the dew drops on its body which makes the picture look very attractive.
- You can continue to shoot for about 30-45 mins after sunrise. The light will be subtle, the butterflies and other insects will not be that active till the moisture on their body dries off
- Look for a subject that has some dew drops on the leaves in the background. There should be adequate light falling on these dew drops in the background. If you take the picture with the subject in foreground and use an aperture setting that will blur the background , the lit dew drops in the background will cast bokeh again making the picture very interesting
- It is very important that you wear light colour clothes blending with nature and also do not use strong perfume or deodorant when going out for macro photography as insects are very sensitive to strong smell
- It is important to understand the insect behaviour. For example a Robber fly has a tendency to return to the same perch if it gets disturbed and flies , Or when it flies away to catch a prey from a perch , invariably it will return back to the same perch with the prey
- Approach the subject slowly. If you are using a tripod, make sure the tripod and the camera are all setup to right height with flash and diffuser before you approach the subject. Make only subtle adjustments once you are close to subject. Take a few record shots from a distance and then slowly move the horizontal arm of the tripod or the macro sliding rail closer to subject and take the pictures
- Try to take shots in burst of 3 frames
Photographer’s ethics
Lastly it is important to practice certain basic ethics to respect insect and plant life while doing macro photography. Never harm insects or nature. Do not disturb the insect egg-sack or spider web in order to get a good composition. There are incidents reported where certain photographers catch hold of subjects freeze them overnight and then use them for taking pictures. I don’t think any picture is worthwhile if taken by causing physical harm or inconvenience to the subject.
Macro photography is an excellent way to present the world of spiders and butterflies to the audience in a way that they are not afraid of it. Please practice these basic principles and you will have lot of fun working on macro photography.
Cheers!


